Cosmetic Dentistry – Matching or Beating Nature
So you had a root canal, broke, or had a lot of decay on a front tooth. Lets say one of your two front teeth, and now need to ‘get your smile back’. Or let’s say you had a fracture on one of them and had to have it extracted and an implant placed. Better yet- we just want to ‘improve your smile’. No matter how we got here — it is time to restore your front teeth with crowns (or veneers), and thats one of the hardest things we do as dentists, and usually something we partner with a ceramist or lab to achieve.
Thankfully, with the advent of technology, we can do a lot to make this process easier and more accurate!
The steps are very similar to traditional crown and bridge, but with a few added bits. Mostly photographs.
First; your dentist will take an impression of your teeth the way they are now – before anything is done to them. Then, he will take a ton of photos, from many different angles, to capture all of the detail in the tooth as it is now, as well as the teeth around it. We will then send the impression (or scan) and photos to the lab for a “waxup” or design of what we want the improved (or replaced) tooth to look like.
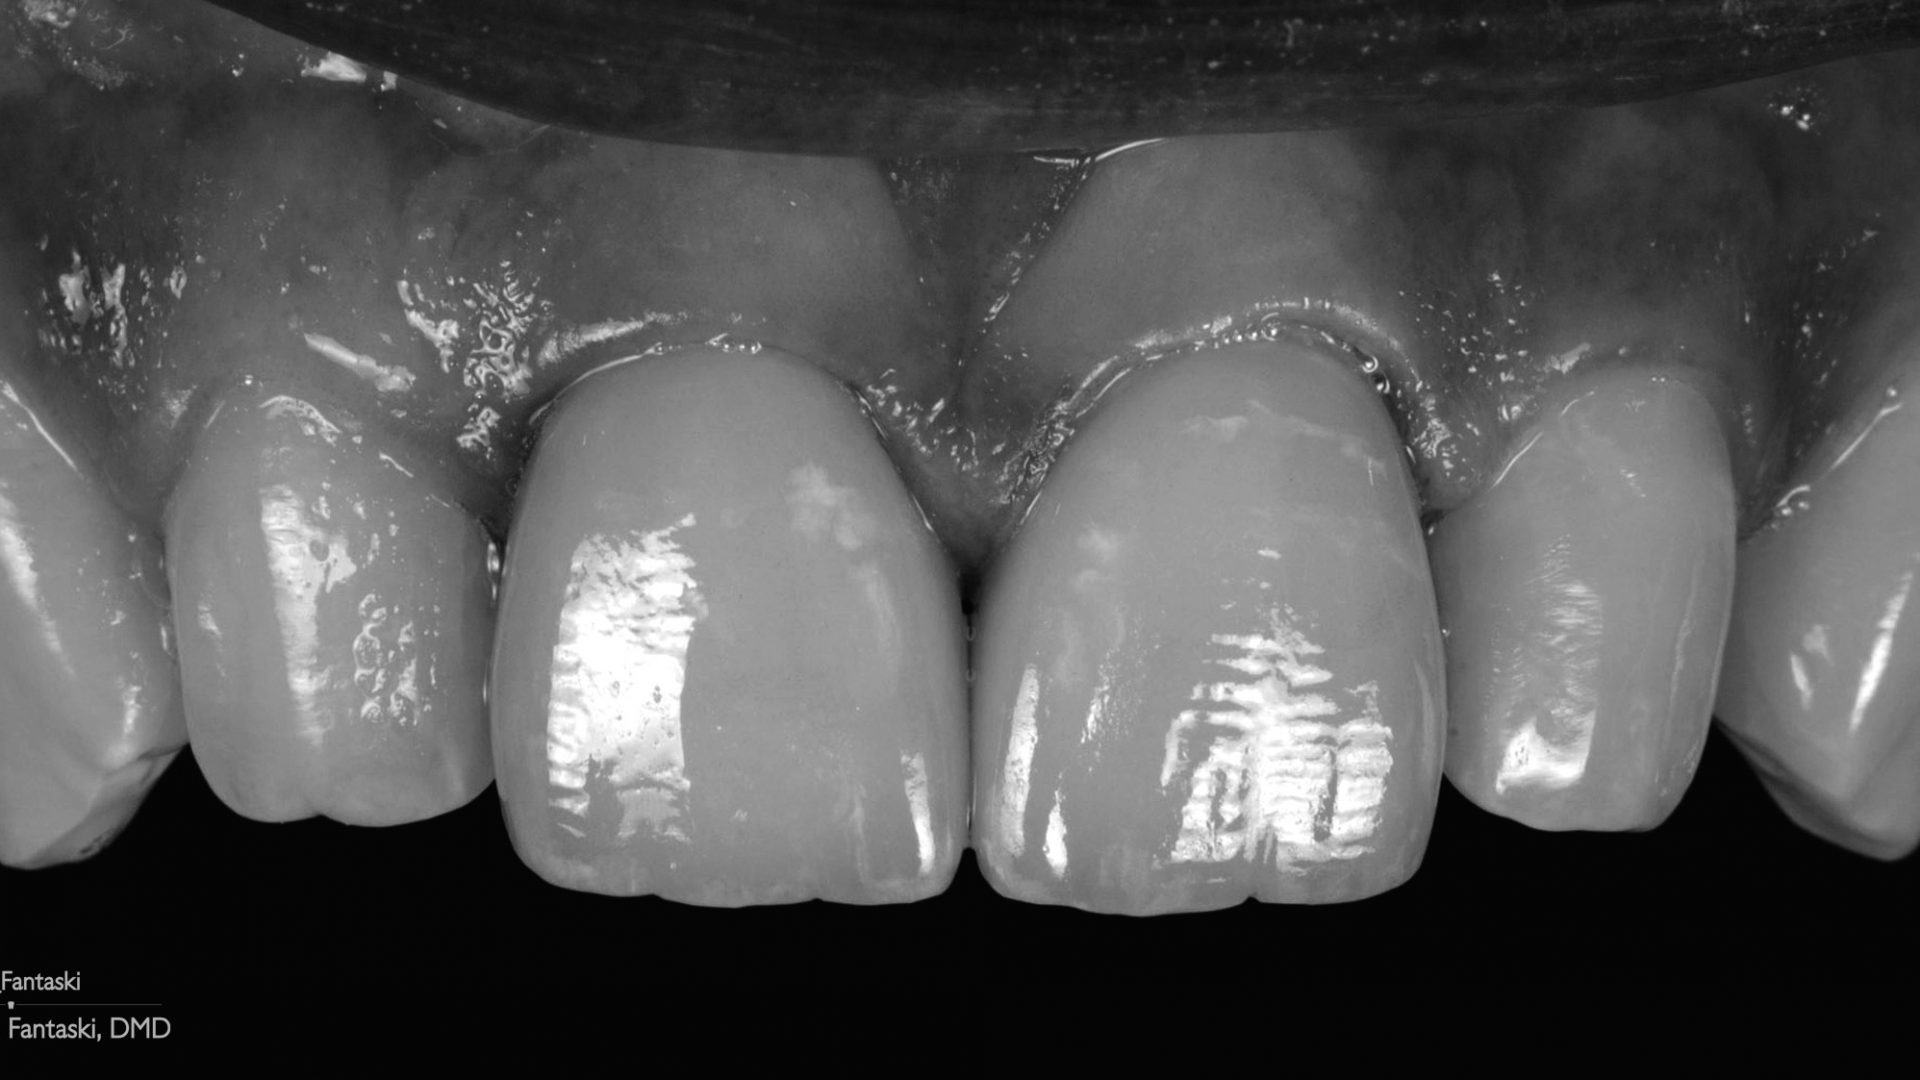
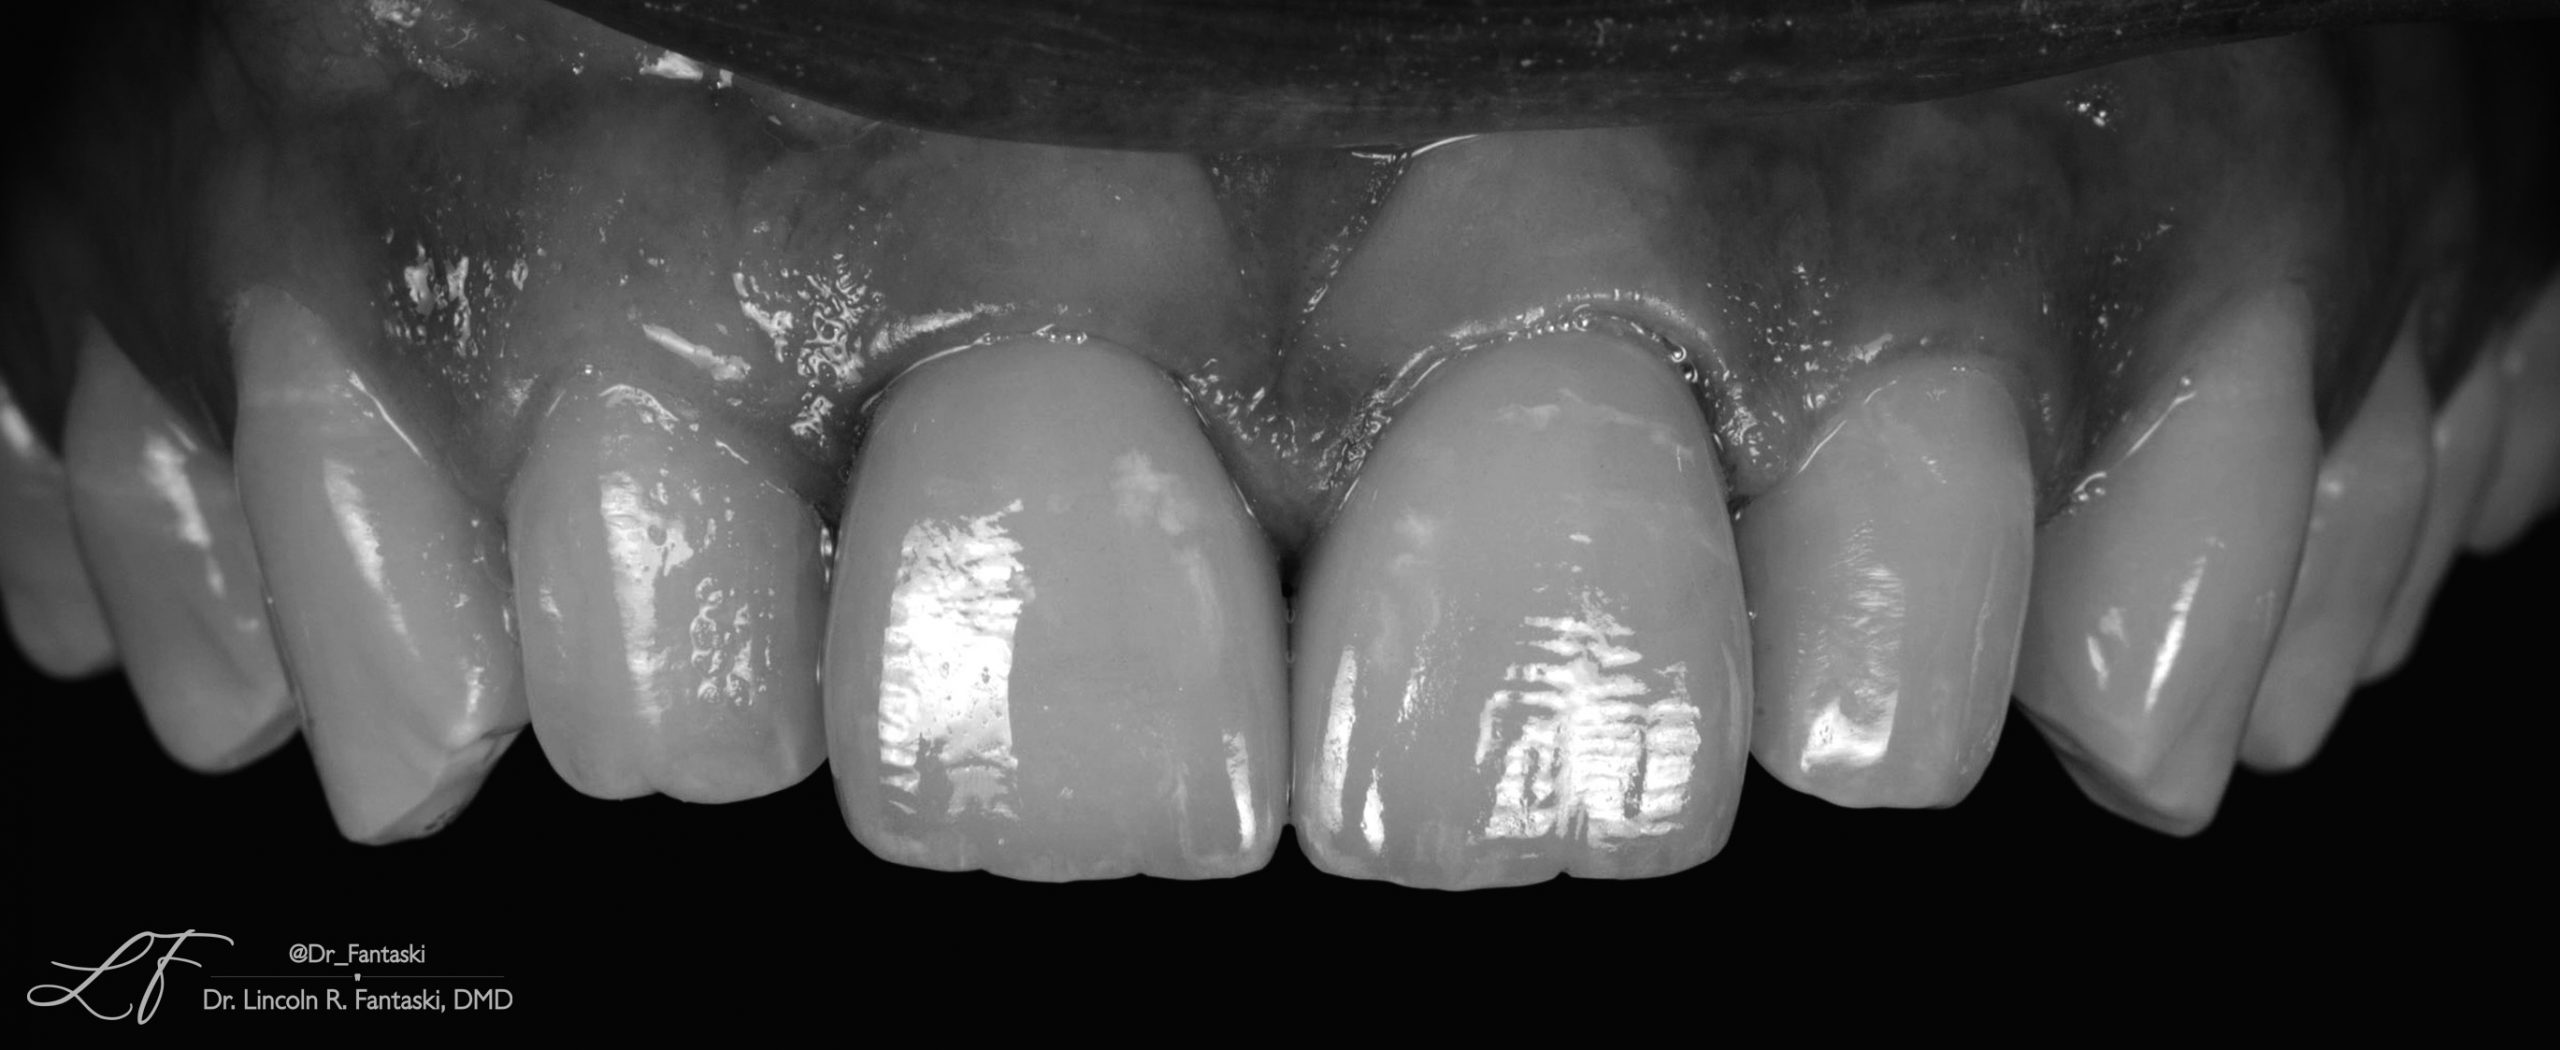
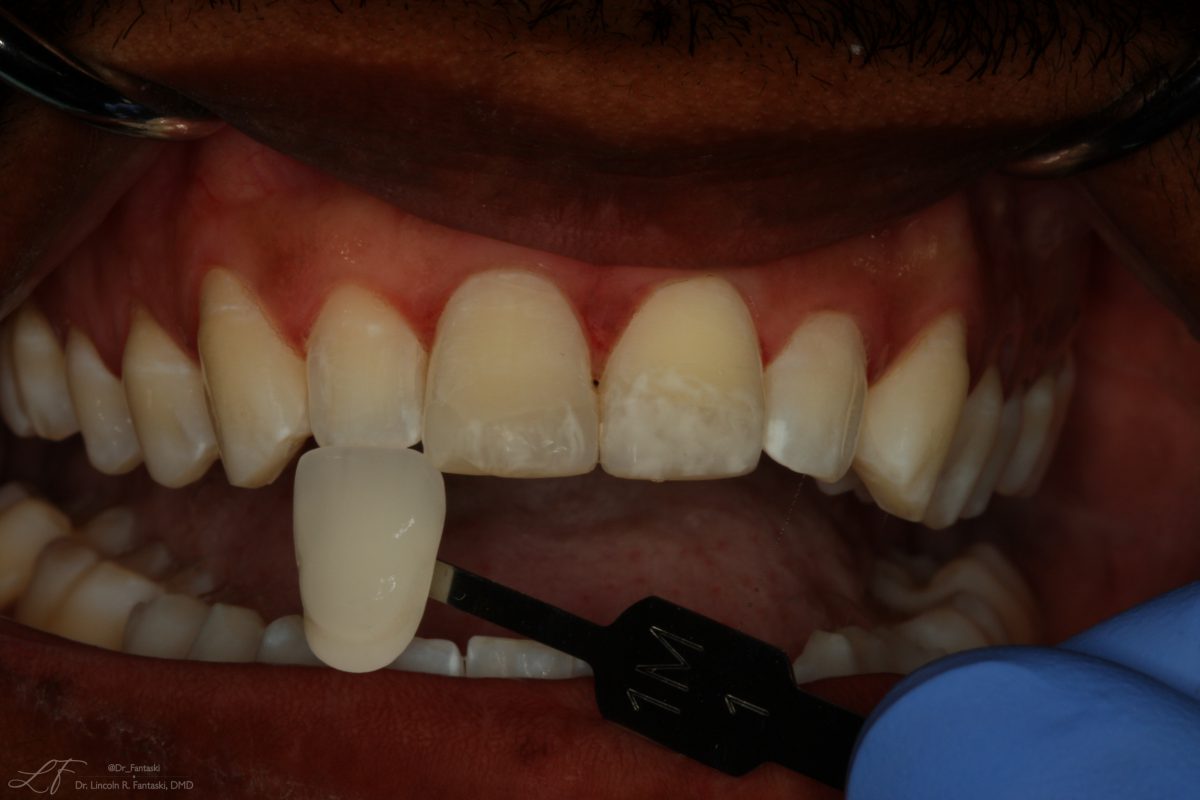
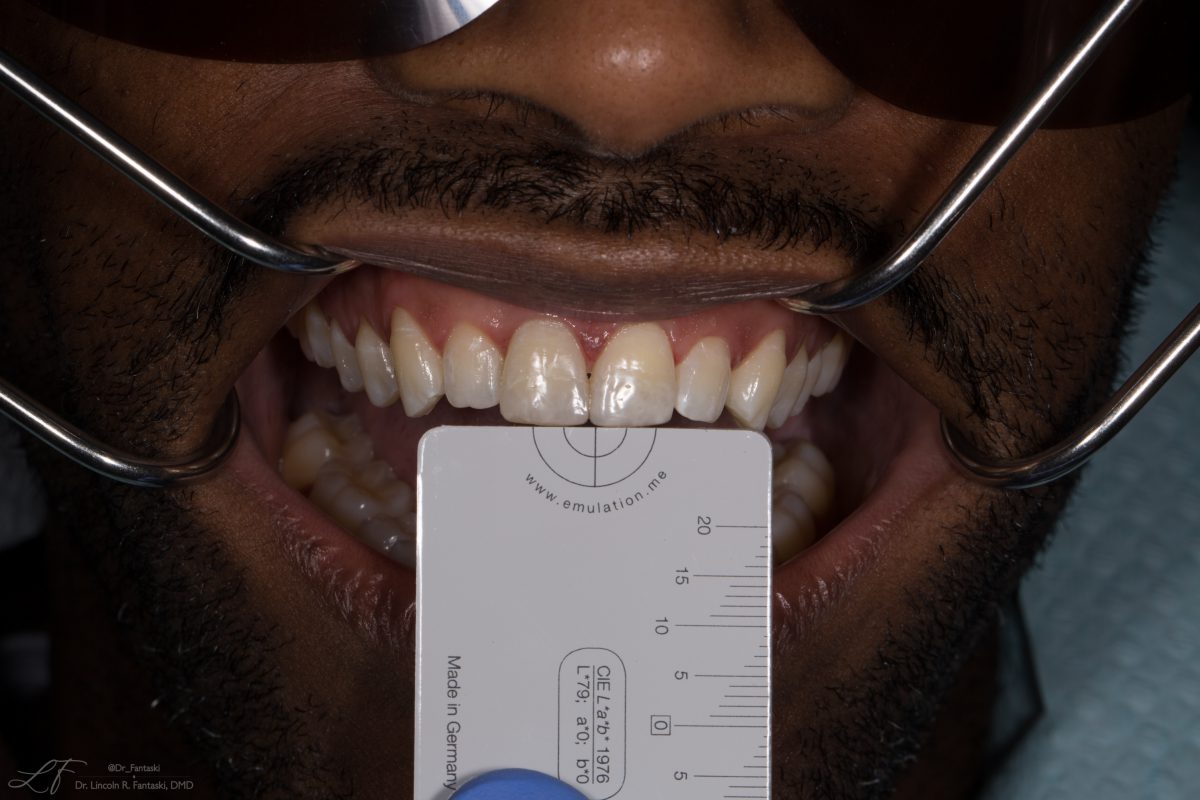
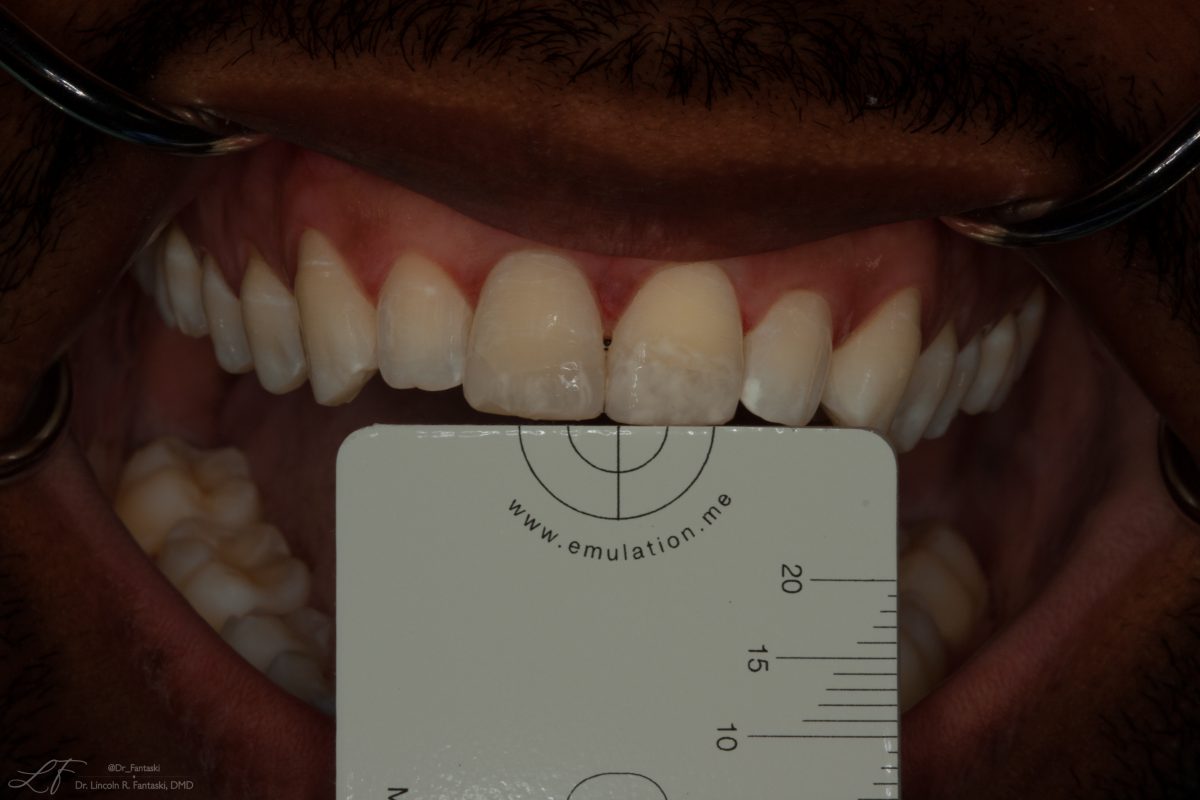
The key to all of these photos is the balance between two types of photography, and flashes. We want to use soft boxes to capture the color, and detail of the soft tissue and teeth, different angles to see the light reflect different ways, and sometimes dual point flashes to get the light to just go everywhere! This is done with traditional photography, using macro lenses. Then, we will switch cameras to utilize a cross polarized lens and ring flash. This setup removes all of the light reflection from the teeth, and reveals any tiny fractures, or color changes in them. Typically at this point we will begin tryin in shades, and taking photos of our shade guides next to your teeth. The goal is to get the shade tab as close as possible using the cross polarized camera.


Once we have settled on a shade, we will use a gray card next to the teeth and shoot a photo of that using the cross polarized cameras as well as the traditional camera with either soft boxes or a dual point flash. The purpose of the gray card is to calibrate the color and light, both between the cameras and between our computers and the ones the lab and ceramist uses.
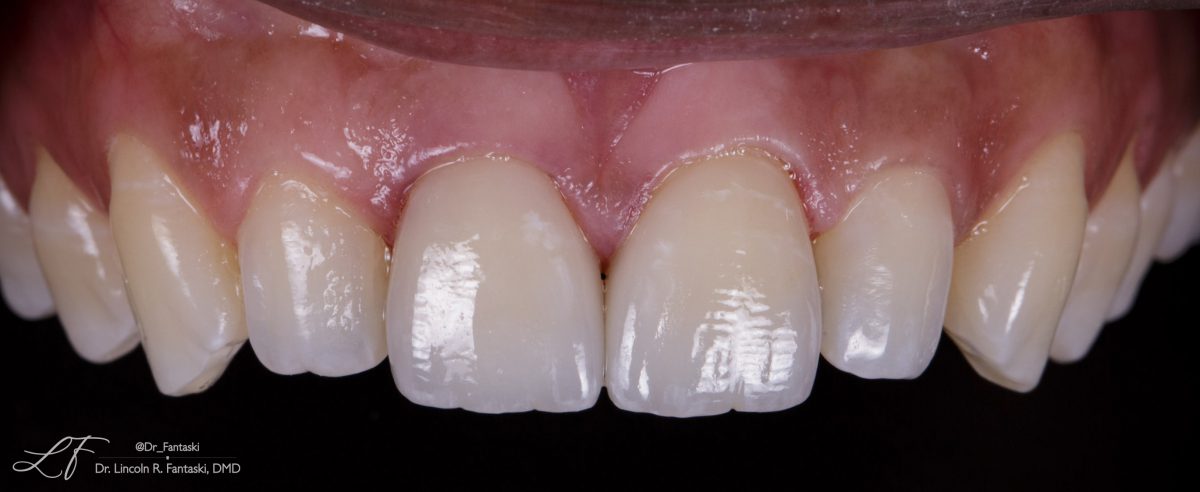
Once we have a ton of photos of your teeth, we will numb the area, and we will place a rubber dam to isolate the area. The teeth are prepared for the crown or veneer, making sure to leave enough restorative room for the future restoration. Then, photos are taken of the ‘stump shade‘ of the tooth so that we know what color will be showing through the final crown, especially if the final crown will be slightly translucent.
Utilizing the latest technology, the lab can take a photo of the finalized crown and “try it in” and see how it fits and matches with your existing teeth. While this helps immensely — it is still possible we will need to try in your crown in person and adjust something so it may take multiple visits to get perfect results for front tooth crowns.
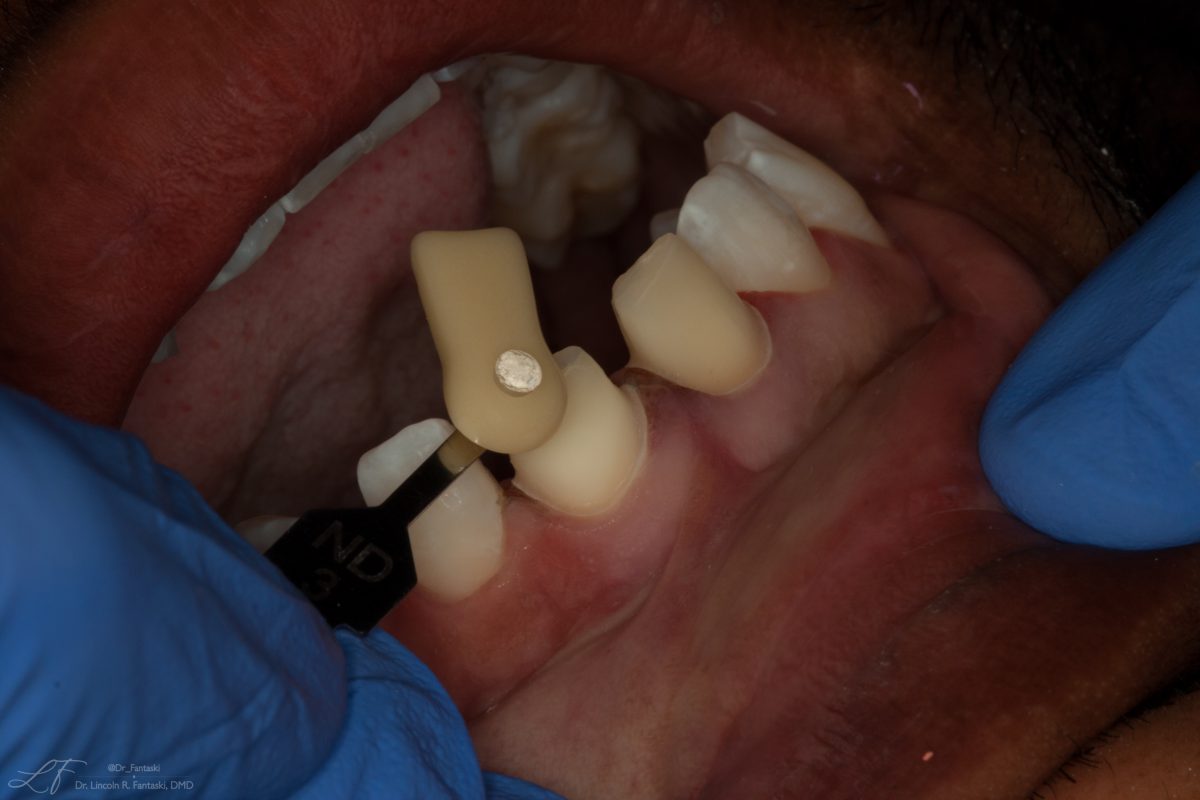
Almost 90% of the time, we will not make these type of restorations in house and they must be sent to our lab partner for fabrication. So therefore, you will need temporary crowns. When we fabricate these, we want to use any design improvements we want to make with the shape of your teeth based on our waxup. Once we make the temporary crown, we are sure to adjust them so that the bite and fit is perfect, but also that you are satisfied with the esthetics. If we made significant changes from the before photos to the temporaries, we will take more photos and another impression to communicate the temp shape to the lab that you and Dr. Fantaski are happy with.
After the lab is done with the crowns, we will bring you in to try them in. we will will often numb the area, and we will take off the temporary crowns. Once we ensure we have removed all the temporary cement it is time to try in the new crowns. We utilize try-in paste for most of these crowns, as we have a variety of cement choices to get the color to match as close as possible. Sometimes, I personally will have patients go outside with a handheld mirror and see what the teeth look like in the sun to ensure everyone is satisfied with the shape and color. Once we are all onboard, its time to bond or cement the crowns and permanently attach them to the underlying tooth or implant.
This process, especially if we are bonding the crowns, is completed and involves a lot of steps, so be patient! Once the cement is cured, and the excess is removed from your gums, we will adjust your bit until it is perfect. We will then show you in a mirror what your final crowns look like! Often at this point, we will take some more pictures, so we can show the lab and further ‘hone in’ our craft of getting the shape and color just right. Sometimes we will want to see you again in a week to make minor adjustments to your bite, and also to take some final photographs of how the crowns look in your smile, when you are no longer numb.